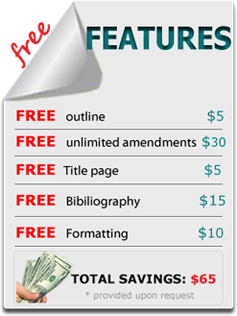
Our Free Services
 Our orders are delivered strictly on time without delay
 No Lateness!
 Our orders are delivered strictly on time without delay
 Our Guarantees

- Free Unlimited revisions
- Guaranteed Privacy
- Money Return guarantee
- Plagiarism Free Writing
Laboratory Assignment
Laboratory Assignment
Project description
Lab 1 is a map of the ocean floor. It shows plate boundaries and features of the continental margin. Read below to learn how to add letters and symbols. Then, complete
the map exercise and written assignment. An atlas or Google Earth will help you locate many of the sites.
Part 1: Map
Review the directions at the end of this document. Then, complete exercises 1-6. When you have completed the map, save it to your computer as a PDF.
1.Label each of the boundaries listed using the letters or shapes indicated: divergent (D), convergent (C), and transform fault boundaries (TF).
2.Label each of the features listed: continental shelf, (SF) continental slope (SL), abyssal plain (AP), seamount (SM), trench (TR), and a hot spot (HS).
3.Label Iceland (IL), Azores (AS), Surtsey (SS), St. Helena (SH), Ascension (AS), and Tristan de Cunha (TC).
4.Using the USGS Earthquake site, label the quakes over a 5.0 magnitude (star: ) and the quake closest to your location (infinity: ). Note that first you may need to
update your settings In the upper right hand corner of the page, you will see an icon that looks like a wheel or gear. Click it and select 7-days, All Magnitudes,
Worldwide. The icon with the three lines to the left of the gear provides you with a list of quakes starting with the most recent.
5.Label the following: Rockies (RK), Himalayas (HM), Andes (AN), and Appalachians (AP).
6.Label the following: Hawaii (HI), Mt. St. Helens (ST), Etna (ET), Pelee (PE), Kilimanjaro (KI), Pinatubo (PI), and Fuji (FJ).
Part 2: Questions
Make sure that you answer each question thoroughly in a separate document.
A.Describe the relationship, if any, of the boundaries in #1 to the features that you labeled in #2.
B.Describe the relationship, if any, of the boundaries in #1 to the islands that you labeled in #3.
C.Describe the relationship, if any, of the boundaries in #1 to the quakes that you labeled in #4.
D.Describe the relationship, if any, of the boundaries in #1 to the mountain chains that you labeled in #5.
E.Describe the relationship, if any, of the boundaries in #1 to the volcanoes that you labeled in #5.
F.What do you think controls the appearance and form of the continental margin?
G.How do you think that the mountain chains in #5 formed?
H.Reflect back on your answer to questions C and E. Based on those responses, does it seem logical that Kilimanjaro is a much bigger volcano than any of the others,
excluding Hawaii? Hawaii is a different type of volcano. Be sure to explain your answer.
How to complete the exercise:
Open the file provided (GEO101_Lab1_Module1_Map.docx). Expand the image (The bigger you can make the window, not the image itself, the easier it will be!). All of the
symbols/letters that you will need are below the image. If not, see the directions below.
If you click on a letter/symbol, you will see a box form around it.
If you grab it by a line, not a circle, you can move it anywhere you wish.
If it is difficult to get the line, you can zoom in or make the box bigger using the circles.
Once placed, you might wish to make the font larger or change the color. Yellow looks good on blue, for example. If, for some reason, the symbols are not the same as
indicated, you can use any symbol you wish; just inform your instructor of what each represents. Do not change anything, however, if it appears as it should.
Note that you will probably need more than the single . If so, just copy it as many times as you need. The easiest way to do that is to grab it by a line and copy and
paste. You may have to shift things around or change your choice a bit if an area gets too crowded with symbols.
When you are done, save the file to your hard drive for backup. You will now want to convert your page into a PDF. This will keep all of your labels in position.
On a Mac, you can just hit Shift+Command+S and change the format. Alternatively, choose Save as and change the format.
On a PC, choose File in the menu, then Save As. Under Save as Type, choose PDF.
Troubleshooting:
If the letters/symbols are missing, you can add them yourself. To insert letters, find your Text Box insertion icon.
On a Mac, it is under Document Elements in the Ribbon. A plus sign at the end of a cursor on a blue ball with a T in the middle will appear. Holding the button, drag a
box on the image. If the text causes part of the image to disappear, click the image, hold onto the Control button while you click anywhere in the image, and select
Format Picture. Choose Layout and select Behind Text.
On a PC, the Text Box icon is under Insert in the Menu. A box may or not be inserted outside the field of the image. However, there should be a little icon to the
right of the box that allows you to choose behind text. If not, right-click the image and choose one or both of the following commands. Grow Font: There should be a
box at the top with a number in it. You can use that to select any font size that you wish. If it is not there, you can choose Format (Mac) or Home (PC) and change the
font there. You can also select the text and hit Control + Mouse button (Mac) or right-click (PC) and change the font.
Change Font Color: At the top of the screen, there should be an A with a line of some color underneath it. Clicking that will allow you to change the color. You can
also change the font as listed above.
PLACE THIS ORDER OR A SIMILAR ORDER WITH US TODAY AND GET AN AMAZING DISCOUNT 🙂

Our Services

- Research Paper Writing
- Essay Writing
- Dissertation Writing
- Thesis Writing
Daily Statistics

- 134 New Projects
- 235 Projects in Progress
- 432 Inquiries
- 624 Repeat clients
Why Choose Us

- Money Return guarantee
- Guaranteed Privacy
- Written by Professionals
- Paper Written from Scratch
- Timely Deliveries
- Free Amendments