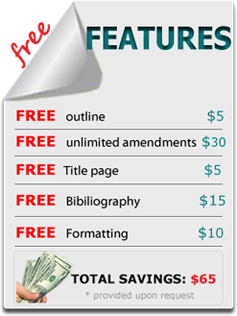
Our Free Services
 Our orders are delivered strictly on time without delay
 No Lateness!
 Our orders are delivered strictly on time without delay
 Our Guarantees

- Free Unlimited revisions
- Guaranteed Privacy
- Money Return guarantee
- Plagiarism Free Writing
BPCS9205 Excel Project Fall 2015
BPCS9205 Excel Project Fall 2015
Part 1 of 2: Creating a personal budget workbook.
As you have seen Excel can be valuable to a wide audience of users. A workbook can be complex, recording data for thousands of financial transactions, or it can simply trace a few monthly expenses. Everyone has to balance a budget, track expenses, or project future income can make use of the financial tools in Excel. In this first part of your project, you’ll use Excel to create a sample budget workbook that will contain information of your choice.
Use the following steps as a guide to completing your workbook.
Note: Please be sure not to include any personal information of a sensitive nature in any workbooks you create to be submitted to your instructor for this exercise. Later, you can update the workbooks with such information for your personal use.
1. Create a new workbook for the sample financial data. Use the first worksheet as a documentation sheet that includes your names, the date on which you start creating workbook, and a brief description of the workbook’s purpose.
2. In the second worksheet, enter realistic monthly earnings for each month of the year. Use formulas to calculate the total earnings each month, the average monthly earnings, and the total earnings for the entire year.
3. On the same worksheet, enter realistic personal expenses for each month. Divide the expenses into at least three categories, providing subtotals for each category and a grand total of all the monthly expenses. Calculate the average monthly expenses and total expenses for the year.
4. Calculate the monthly net cash flow (the value of total income minus total expenses).
5. Use the cash flow values to track the savings throughout the year. Use a realistic amount for savings at the beginning of the year. Use the monthly net cash flow values to add or subtract from this value. Project the end-of-year balance in the savings account under your proposed budget.
6. Format the worksheet’s contents using appropriate text and number formats. Add colours and line borders to make the content easier to read and interpret. Use cell styles and themes to provide your worksheet with a uniform appearance.
7. Use conditional formatting to automatically highlight negative net cash flow calculated in Step 4.
8. Insert a pie chart that compares the TOTAL ANNUAL expenses for the categories.
9. Insert a column chart that charts all the monthly expenses regardless of the category.
10. Insert a line chart that shows the change in the savings balance throughout the 12 months of the year.
11. Insert new rows at the top of the worksheet and enter titles that describe the worksheet’s contents.
12. Think of a major purchase you might want to make—for example, a car. Determine the amount of the purchase and the current annual interest rate charged by your bank. Provide a reasonable length of time to repay the loan, such as five years for a car loan or 20 to 30 years for a home loan. Use the PMT function to determine how much you would have to spend each month on the payments for your purchase. Add this information to your monthly budget. If the payment exceeds your budget, reduce the estimated price of the item you’re thinking of purchasing until you determine the monthly payment you can afford under the conditions of the loan.
13. Format the worksheets for your printer. Include headers and footers that display the filename of your workbook, the workbook’s author, and the date on which the report is printed. If the report extends across several pages, repeat appropriate print titles on all of the pages and include page numbers and the total number of pages on every printed page. Save and close your workbook. Submit your printed hardcopy workbook on the due date.
Part 2 of 2: Tracking and analyzing data.
Excel can be a useful program for tracking information about many everyday activities, such as
? Organizations you belong to/participate in
? Collections
? Hobbies
? Community work
? Social Events
? Sports records and statistics
? Business ventures
In part 2, you need to select an area that fits your interests and create an application in Excel to track information related to your area of interest.
1. Plan the organization of your workbook—what information related to your area of interest do you want to track; what fields do you need to enter; how will you organize the data; what calculation will you need to perform; how do you want to format the information, and so on.
2. Create a Documentation worksheet that includes your name, the date, and the purpose of your workbook. Format it appropriately.
3. Set up multiple worksheets to record your data on (for example, a budget for each event could be a separate worksheet). Use a worksheet group to enter labels and other nonvariable text, formatting, and formulas in the worksheets.
4. Apply validity checks to improve the accuracy of data entry.
5. Create a summary worksheet that consolidates the information from these worksheets.
6. Create an Excel table to track data. Enter an appropriate table name, column headers, and formulas. Format the table attractively. Add records to the table. Insert a Total row in the table with an appropriate summary calculation (SUM, COUNT, etc.).
7. Add a calculated column to the table with an appropriate function (such as an IF function, and AND, function, and so on).
8. In the worksheet with a range of data, define names for cells and ranges. Convert the existing formulas in the worksheet to use the defined names.
9. Paste a list of defined names as documentation in the Documentation sheet.
10. Check for duplicate values using conditional formatting.
11. Check for data entry errors using the IFERROR function.
12. Sort the data as needed.
13. Use a filter to answer a specific question about the data. Add a comment to explain how the data was filtered and what question it answers.
14. Plan and record an appropriate macro. Assign the macro to a button. Save the workbook in macro enabled format.
15. Prepare the workbook for printing. Include headers and footers that indicate the filename of your workbook, the workbook’s author, and the date on which the workbook is printed.
16. Save the workbook and submit an electronic copy through Blackboard Assignments.

Our Services

- Research Paper Writing
- Essay Writing
- Dissertation Writing
- Thesis Writing
Daily Statistics

- 134 New Projects
- 235 Projects in Progress
- 432 Inquiries
- 624 Repeat clients
Why Choose Us

- Money Return guarantee
- Guaranteed Privacy
- Written by Professionals
- Paper Written from Scratch
- Timely Deliveries
- Free Amendments